With Structure, you can track all the work items for upcoming releases – even if they're from different projects – and visualize all the data you need to track on a single screen.
Step 1: Build a Release Management Structure
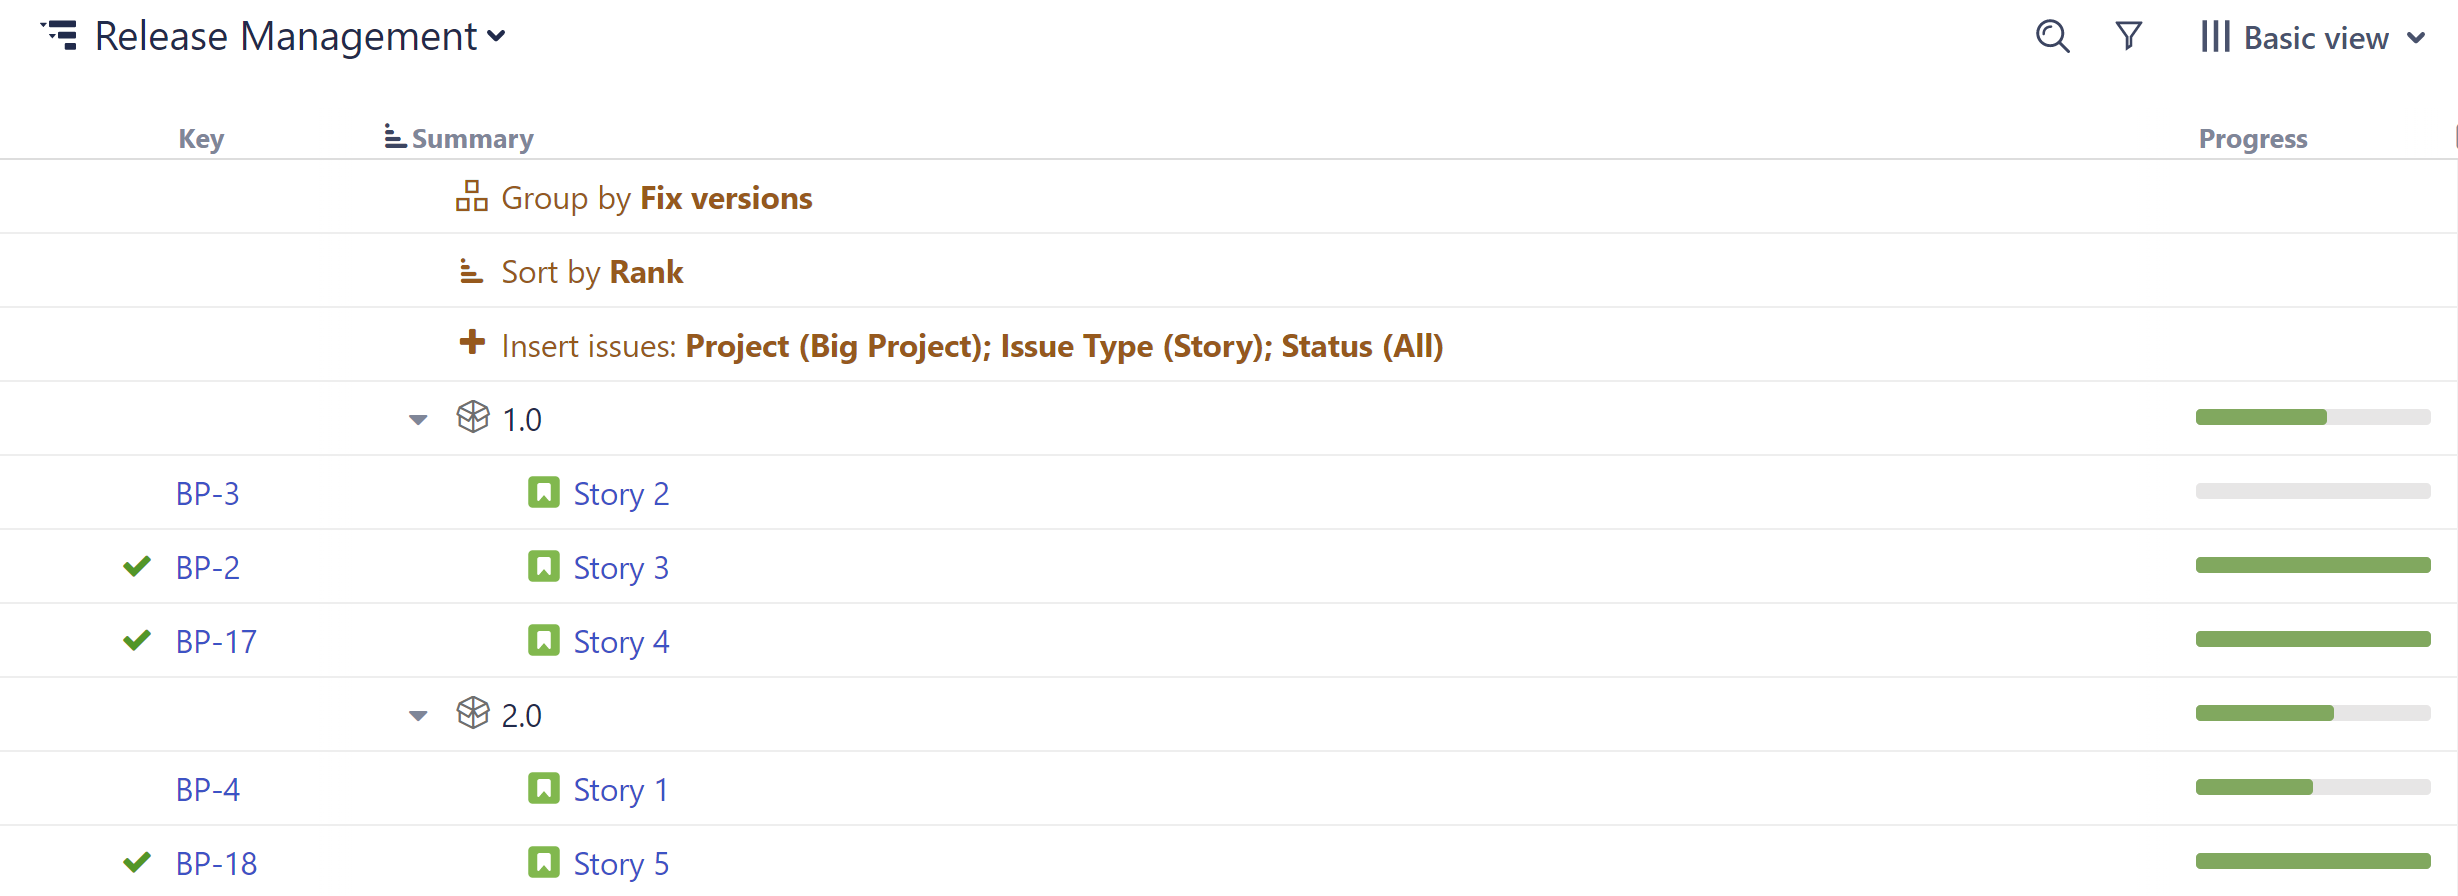
To create a structure for release management:
-
Open the Structure Selector menu and select Create New Structure
-
Add the work items you want to track – you can add them manually or automatically using +Add | Insert | Basic Insert
-
Group work items by fix version: +Add | Group | Field | select "Fix Version/s"
Want to include epics and stories?
-
When inserting work items, add epics: +Add | Insert | Basic Insert | open the Issue Types dropdown and select Epic
-
Add your stories: +Add | Insert | Child Work Items | under Add, select Work Items under epics and (optional) Sub-tasks.
Step 2: Add Data
Next, add the data you need to track by clicking the + button at the top-right corner of the structure. You can add as many columns as you need, including:
-
Jira Fields - For each Jira field, Structure offers a column that displays that field's value.
-
Progress - Display an aggregate work item progress, which is calculated based on values from the work item and its sub-work items.
-
Totals - Display aggregate values for work item progress, which include progress values from sub-work items.
-
Service Management - Jira Service Management customers can visualize and manage SLA fields within a structure.
-
Work Logged - View and manage Timesheets by Tempo work logged data alongside your project data.
-
Many more - To learn more about the available columns, see Adding Columns .
Once you've added your columns, you can aggregate the data up the structure. To do so, open the column you want to aggregate and select Sum over sub-items.
Looking to manage resources for your next project? Planner makes it easy to plan resources and capacity for your team.