Adding the Account field to the Jira work item screen requires the Jira Administrator permission.
The Tempo Account custom field is installed automatically with Tempo Accounts. To make use of the field in relation to the Tempo Products, it needs to be associated in either (or both) of these ways:
-
At the Jira Work Item level, which requires that you associate the Tempo Account custom field to the desired Jira work item screens (see below for steps).
-
To Tempo Timesheets time records, which requires that you add the Tempo Account custom field as a Work Attribute so that it appears in the Log Time form.
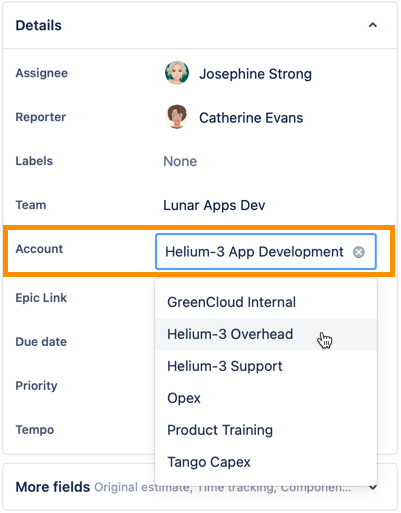
In both cases, the Tempo Account custom field is displayed as a dropdown showing only accounts that are linked to the Jira project .
For more information on why to use these Account options, see Account Field vs the Account Work Attribute
To add the Account field to Jira work item screens:
-
Click Jira settings in the upper-right corner.
-
Select Work Items from the Jira settings menu.
-
Under Fields, select Custom fields.
-
Go to Account, which is the Tempo Account Custom Field.
-
Click the ellipsis (...) to the right and select Associate to Screens from the dropdown.
-
Select one or more Jira work item screens where you would like to associate the field (such as the Default Screen, Resolve Issue Screen, or Workflow Screen).
-
Click Update to save.
Now the Account field will appear as a dropdown in the Jira work items that use these screens.
-
Link an account to one or more Jira projects.
-
In a Jira work item, select the appropriate account from the Account dropdown to link this work item to that account. Only accounts that have been linked to Jira projects appear in this list.
To see all time logged to the Jira work items attributed to an account, created a Logged Time report that is filtered by the Account, then group by Project and Issue.
Want to know how to add Account fields in Jira team-managed projects? See Managing Tempo App Fields in Jira Team-Managed Projects .